Friday, June 30, 2017

Make Your Own Sunshine Card

Hello and welcome!

Sneaking in one last card over at the Coffee Lover's Blog Hop. Can you believe there is well over a thousand cards entered! Way to go everyone!


I was inspired by Ellen Hutson's beautiful mood board and the sentiment is from Ellen Hutson's All Inside stamp set. I used the fun color combo from Winnie & Walter along with their Big Bang Sci-Fi Star stencil and Scenery Stripes stamp set. The coffee cup is a diecut by Simon Says Stamp and Distressed inks were used for stamping and blending.

This card is entered in:


  • The "Stencil It" Monday challenge at Simon Says Stamp

-june

Metro Demo Layout

Hello and Welcome!

My son worked hard with his robotics marketing team to put together a corporate presentation to help raise funds. This was their first demonstration for Metro Storage. Greg, the manager, was so supportive of the kids. He even called the local newspaper to cover it! 


I used KaiserCraft's Technologic and Off The Wall collections for this page. These papers are prefect to scrap robotics photos. I also stenciled a large robot using silver embossing paste.


This page is entered in:
  • The "Stencil It" Monday challenge at Simon Says Stamp

Thanks for stopping by,
-june

Wednesday, June 28, 2017

Two Ways To Color Using PowderPuff Chalking Inks

Hello and Welcome!

I love blending inks and PowderPuff Chalking Inks are the best I've found for this technique. Check out the smooth and effortless results!


Here is a quick "how to" for this card:
  • Hand cut a hill mask from typing paper
  • Blend Limeade and Green Leaf PowderPuff Chalking Inks
 
  • Using the other half of the mask, cover the green area
  • Blend sunshine with Sunset, Orange Slice and Buttercup PowderPuff Chalking Inks
 
  • Stamp Verve Stamps coffee cup
    • color with Copic markers
    • attach
  • Stamp Freckled Fawn sentiment and heat emboss
  • Paint Quick Quotes' chipboard heart (from March's Club Q) with White Ice Pearl Pen
    • attach
 
  • Matte picture on Quick Quotes' Winter Bliss 100 and 102 
    • edge with Rose Petal PowderPuff Chalking Ink
  • Attach to card base
  • Add sequins

I also wanted to share with you the card I made my husband for Father's Day. This Joy Clair knight stamp worked well for my "knight in shining armor," and the Quick Quotes' Mulberry collection is perfect for masculine cards.


I watercolored the stamp using Coal Miner, Feather Gray, Slate and Warm Gray PowderPuff Chalking Inks, which I smooched onto an acrylic block and applied with a waterbrush. (The shield was colored with Copic markers.)


To assemble the card:
  • Cut knight image to 2.75" x  4.5"
  • Emboss  3.5" x 5" Mulberry 105
    • edge with Plum PowderPuff ink
    • attach knight image
  • Layer on 4" x 5.25" Mulberry 100, edged with Latte PowderPuff ink
  • Wrap silver thread around the bottom
  • Layer on 4.25" x 5.5" Mulberry 105, edged with Plum PowderPuff ink
  • Add gems and attach to card base 

Close-up of layers


Quick Quotes Products Used:
 Coffee Card:
 Winter Bliss Paper Pack
  PowderPuff Chalking Inks: Rose Petal, Limeade, Green Leaf, Sunset, Orange Slice, Buttercup

 Knight Card:
 Mulberry Paper Pack
 PowderPuff Chalking Inks: Plum, Slate, Warm Gray, Latte, Feather Gray, Coal Miner 


Other Products:
 Verve Stamps coffee cup stamp
 Freckled Fawn sentiment stamp
 sequins

Joy Clair's Armor of God stamp set
 embossing folder
 gems
 silver thread


Entered in:
Thanks for stopping by,
-June 

Tuesday, June 27, 2017

Mr. Coffee Card

Hello and Welcome!

My goal for this card was to make a masculine coffee card using my new Paper Smooches stamps and dies. Meet Mr. Coffee!


If you are a Paper Smooches fan, Mr. Coffee may look a little familiar. The face and tie were fussy cut from the cute professor in their Smarty Pants set. Glossy Accents was added to the glasses. The cup and beans are from Paper Smooches' Cozy Coffee die set. And the heat embossed sentiment is from Paper Smooches' Cyber Cafe stamp set.

To add some fun color, because that's what I do, coffee beans were stamped in a rainbow of Distress Ink colors in the background.

Thanks for stopping by,
-june

This card is entered in:


Monday, June 26, 2017

Art Impressions Coffee Loving Card

Hello and Welcome!

This is me (well, I'm a little younger) in the mornings. I seriously do love my coffee, and this fun image by Art Impressions (Ai)


I created the background with a rainbow of coffee beans from Ai's Hot Java Mama set (which is one of the prizes up for grabs at the Coffee Lovers Blog Hop!) and distress inks. Don't you just love the vivid colors?

The coffee-loving lady is from the same Ai set and was colored with Copic markers. The sentiment is also from Hot Java Mama and was heat embossed with white embossing powder.

It is a little hard to photograph, but Nuvo Crystal Drops were add for shine and dimension to the coffee and lady's glasses.

This card is entered in:
                              
              
Thanks for stopping by,
-june

GSD Turtle Hello Card

Hello and Welcome!

I had great fun creating this floral background with Raisin Boat's Oops Daisy stamp (sadly Raisin Boat is going out of business this month, everything is 60% - 74% off), gold embossing powder and Zig Clean Color markers.


The adorable turtle is by Gerda Steiner and also colored with Zig markers, then fussy cut. The "hello" is a die by Ellen Hutson.

This card is entered in:
               
               
Thanks for stopping by,
-june

Sunday, June 25, 2017

Treat Yourself

Hello and Welcome!

Oh yea! It's Coffee Lovers Blog Hop time!!!! This is how I feel every morning...


Can you guess what the "CLBH" on the cup stands for? Yep, Coffee Lovers Blog Hop.

If you are looking for the stamps, I used Stamps By Judith (bear), Endless Creations (cup), Art Impressions (greenery), Hero Arts (sentiment), Marvy pens and pattern papers by Jillibean. The card is based on a sketch at Your Next Stamp blog. This card was also inspired by Kelly Latevola's video (on Simon Says Stamp blog) on creating watercolor stamping.
This card is entered in:
              
               
               workitwedbanner

Thanks for stopping by and for all of your kind messages,
-june

Saturday, June 24, 2017

Driven To Drive Layout for Scrap Our Stash

Hello and Welcome!

The summer is just flying by! It was fun seeing my 16 year old go through the process of getting his driver's license. Such a big step. He worked really hard at it and passed the test on his first try!


 I designed this layout for Scrap Our Stash's June Sketch Challenge with the stash item word challenge of - SUMMER.

No automatic alt text available.

I used 3 photos instead of 4, but otherwise I stayed pretty close to the sketch.

For my stash items, I used:
S - splatters (gold Color Shine)
U - Uniball white pen
M - maps or Making Memories paper
M - Martha Stewart border punch
E - ephemera
R - red

Here are a couple details.

Embellishment clusters:

Journaling area:

If you would like to play along you can join us at Scrap Our Stash. You will not only get a page done, but you might win a great prize!

This page is entered in:
Simon Says Wed. Challenge: Use Pattern Paper

Thanks for stopping by,
-june

Tuesday, June 20, 2017

Girlfriend Getaway Layout

Hello and Welcome!

My friend, Sue, and I do a "girlfriend getaway" in January and go see author & comedian Lorna Landvik at the Bryant-Lake Bowl. Here we are with Lorna herself!


The Bryant-Lake Bowl is kind of a "hole-in-the-wall," so this grungy paper was just right. To bring a feminine twist to it, I added pink, glitter paste with a TSW brick stencil and Prima flowers.


For a theater feel (yes, there is a tiny stage in this bowling alley!), I added gold, glitter accents and heat embossed (hard to photograph) a frame around the outside of the page with WOW's Cloud Nine embossing powder.


The design of this layout is based on a sketch at Stuck?! Sketches.

This page is entered in:
               
  • The "Emboss It" Wednesday challenge at Simon Says Stamp

Thanks for stopping by,
-june

Design Team Layout

Hello and Welcome!

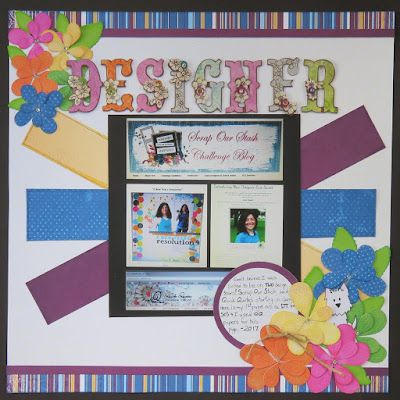
I had this blog for only about a year when I was chosen to be on TWO design teams! Still can't believe I was picked to be on Quick Quotes' AND Scrap Our Stash's design teams. I, of course, had make a layout about it.


The papers are Quick Quotes' Mulberry collection. The flowers are Poppy Stamps' Stitched Bloom Trio diecuts, with embossed stitching and edged with Quick Quotes' PowderPuff Chalking inks. The letters are by K & Co.


The adorable pup is Flogger by Latina Crafter. This page is based on a sketch on the Latina Crafter's blog.


This page is entered in:
  • The "Emboss It" Wednesday challenge at Simon Says Stamp
               

Thanks for stopping by,
-june

Monday, June 19, 2017

Enjoy The Summer with Quick Quotes Club Q!

Hello Quick Quote fans, June here today.

I am loving the June Club Q kit, it is all about summer and fun! You can check it out here.

I was inspired by the beautiful orange striped paper and white chipboard suns in the "Big Altered Project" kit, it was prefect for this photo of my son leaping into the air on his last day of school.


Even thought the original design of the Big Altered Project kit is to create a mini album, I found it worked well for making 12" x 12" pages, too! (Two papers were also used from the Page Layout option.) The small pre-cut papers work well as photos mats, backgrounds and accents, plus there are so many cute, white chipboard pieces to play with. With the addition of the Page Layout option (or save by buying the Ultimate Combo Club Q) you can make several matching pages.


To bring extra pizzazz to this page:
  • Suns and "summer" chipboard from the kit was backed with white cardstock that was colored by blending Sunset and Buttercup PowderPuff Chalking Inks to make them POP
 
  •  A frame and 2 flowers from the kit were colored with Sunset and Buttercup PowderPuff Chalking Inks
 
  • 3 flowers from the kit were colored with Seafoam and Sky Blue PowderPuff Chalking Ink
  • Raffia from the kit was added to the title
 
  • Several cut-apart quote banners were attached with mini copper brads from the kit
  • All the papers were edged with Sunset or Seafoam PowderPuff Chalking Inks
  • Drywall mesh tape and ribbon (not included) were added to the background for texture

Products Used:
 June Club Q
 PowderPuff Chalking Inks: Sunset, Seafoam, Sky Blue and Butterup


This page is entered in:

Thanks for stopping by,
-june/DT Member 
 

Wednesday, June 14, 2017

Mom's Day Layout

Hello and Welcome!

Ever since I was little, I wanted to be a mommy. Throughout my life I've had several wonderful careers, but I have always been first and foremost a mom and wife. How could I not love it with these fabulous men!


I wanted something very special for this photo and Lilith Eeckles great sketch and video at the Altenew blog was prefect and sooo inspiring. I stayed pretty true to the sketch and video suggestions.

Sketch-Challenge-2-Blog-1

Altenew's Wild Hibiscus stamp set was, well, made for Mother's Day and prefect to incorporate into this layout. The flowers and butterflies stamped from this set were watercolored with Prima's Watercolor Tropical Confections and dimensional paint was added to the centers.  The sentiments are also from Altenew's Wild Hibiscus and heat embossed with WOW's white embossing powder.


I also fussy cut the rose flowers from papers in Altenew's Reflections Scrapbook Collection and added them to the floral clusters. (Oh, how I love this collection!)  Mixed in the clusters are gold embossed Circle Loop diecuts by Simon Says Stamp. The letter stickers, decorative wood brads, striped pattern paper and even the date stamp are all from the Reflections kit. 


To finish off this page, I blended gray inks over Altenew's beautiful Stone Wall stencil to ground the photo, and then splattered gold Color Shine over the layout.


This page is entered in:
                Sketch-Challenge-2-Blog-1
Thanks for stopping by,
-june

Saturday, June 10, 2017

Licensed To Drive for Scrap Our Stash

Hello and Welcome!

This page shows my son just after he tested for his driver's license, and he got it on his first try! Aaron is loving his independence and so are we. In true scrapbooking form, I got him being triumphant in front of the DMV and taking off on his first solo drive.


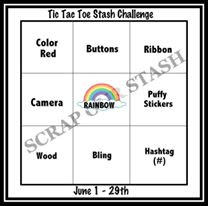
 Scrap Our Stash is having fun tic-tac-toe challenge. I used the diagonal - RIBBON, RAINBOW and WOOD. (I "accidentally" did both diagonals with RED, RAINBOW and HASHTAG.) Check it out  here and if you play along you could prize a great prize.

June Tic Tac Toe Stash Challenge

 
I raided my stash for fun car related items and found some great chipboard car parts by Creative Embellishments. I colored "chippies" with silver Inka Gold. To created the rainbow tire track background with a Creative Embellishment's stamp and Quick Quotes' PowderPuff colored ink. I used Simple Stories pattern papers. (Can you find the name of the collection from the tear strip used as an embellishment on this page?

This layout is entered in:
  • The "Make It Masculine" Wednesday challenge at Simon Says Stamp
  • The Creative Embellishments June Challenge. I was inspired by the gears and the guy driving.

Thanks for stopping by and happy crafting!
-june


Thursday, June 8, 2017

Collage Printing with Canon Selphy and Quick Quotes

Hello Quick Quotes Fans! June here today to share with you a fun layout and wonderful feature of the Canon SELPHY.

My son and I love to go on mini adventures on his school breaks and try to do something each day. This is a page of our spring break trips this year.


I just discovered the most amazing feature of my Canon Selphy CP1200 - the SHUFFLE collage! Check it out, 6 photos on one standard size print (it will do up to 20 photos). Plus this fabulous little machine magically knows which way the to orientate the pictures and clusters them together.


 It is so easy to do:

  • Go through the normal steps:
    • Turn it on,
    • Upload photos
    • Press Menu
  • Using the down arrow key move cursor to "Change Setting," press "ok" button
  • Using the down arrow key move cursor to "Page Layout"
  • Using the right arrow key scroll thru collage options to "Shuffle," press "ok" button
  • Select collage options, then press "back" button
  • Press "menu," with up arrow key move cursor to "Select and Print," press "ok"
  • Press right arrow to scroll thru photos
    • Press up arrow to add picture to collage.
    • You can add as many photos as you like up to 8 or 20, depending on the collage options you choose.
    • Don't worry, the Selphy orientates and sizes each of the photos.
  • Now for the best part, press the "print" button and watch the magic happen!


To create this layout I used Quick Quotes "49 Shades of Grey" collection. Here are the directions:
  • cut Windsong WS105 to 11.5" x 11.5" and attach to 49 Shades of Grey SH-100
  • mat photos on SH-101
  • cut 3 strip from SH-105 and cut each stripe to 4" long
  • punch/diecut 5 orange and 7 blue flowers
  • punch a 2" circle from Windsong WS105
  • cut circle phase embellishment from SH-500
  • edge all elements with Coal Miner PowderPuff Chalking ink
  • add gems to flowers and journaling to large circle 
  • add title across the top and assemble as shown
  • finish up with Quick Quotes Metal flowers and twine bow
Here are a few close-ups:


Quick Quotes Products:
 49 Shades of Grey - 100, 101,105, 500
 Windsong Paper Pack
 PowderPuff Chalking Ink - Coal Miner
 Metal Embellishment flowers

 Printer- Cannon SELPHY CP1200

Other Products:
 Simon Says Stamp - Fresh Daisy and Marissa snowflake dies
 flower punches
 letter stickers 
 gems

This page is entered in:

Thanks for stopping by and give that SHUFFLE collage a try!
-june